在设备上运行
在将应用发布给用户之前,在实际设备上测试你的应用始终是一个好主意。本文档将指导你完成在设备上运行 React Native 应用并为其生产做好准备的必要步骤。
¥It's always a good idea to test your app on an actual device before releasing it to your users. This document will guide you through the necessary steps to run your React Native app on a device and to get it ready for production.
如果你使用 create-expo-app 设置项目,则可以通过扫描运行 npm start 时显示的二维码在 Expo Go 中的设备上运行你的应用。有关详细信息,请参阅 在你的设备上运行你的项目 Expo 指南。
¥If you used create-expo-app to set up your project, you can run your app on a device in Expo Go by scanning the QR code that is displayed when you run npm start. Refer to the Expo guide for running your project on your device for more information.
- Android
- iOS
在 Android 设备上运行你的应用
¥Running your app on Android devices
开发操作系统
¥Development OS
- macOS
- Windows
- Linux
1. 启用通过 USB 调试
¥ Enable Debugging over USB
默认情况下,大多数 Android 设备只能安装和运行从 Google Play 下载的应用。你需要在设备上启用 USB 调试才能在开发期间安装你的应用。
¥Most Android devices can only install and run apps downloaded from Google Play, by default. You will need to enable USB Debugging on your device in order to install your app during development.
要在设备上启用 USB 调试,你首先需要启用 "开发者选项" 菜单,方法是转至设置 → 关于手机 → 软件信息,然后点击底部的 Build number 行七次。然后你可以返回“设置”→“开发者选项”以启用 "USB 调试"。
¥To enable USB debugging on your device, you will first need to enable the "Developer options" menu by going to Settings → About phone → Software information and then tapping the Build number row at the bottom seven times. You can then go back to Settings → Developer options to enable "USB debugging".
2. 通过 USB 插入你的设备
¥ Plug in your device via USB
现在让我们设置一个 Android 设备来运行我们的 React Native 项目。继续通过 USB 将你的设备插入你的开发机器。
¥Let's now set up an Android device to run our React Native projects. Go ahead and plug in your device via USB to your development machine.
现在,通过运行 adb devices 来检查你的设备是否正确连接到 ADB(Android 调试桥)。
¥Now check that your device is properly connecting to ADB, the Android Debug Bridge, by running adb devices.
$ adb devices
List of devices attached
emulator-5554 offline   # Google emulator
14ed2fcc device         # Physical device
在右栏中看到 device 表示设备已连接。你一次只能连接一台设备。
¥Seeing device in the right column means the device is connected. You must have only one device connected at a time.
如果你在列表中看到 unauthorized,则需要运行 adb reverse tcp:8081 tcp:8081 并按允许在设备上进行 USB 调试。
¥If you see unauthorized in the list you will need to run adb reverse tcp:8081 tcp:8081 and press allow USB debugging on the device.
3. 运行你的应用
¥ Run your app
从项目的根源开始;在命令提示符中键入以下命令以在设备上安装并启动你的应用:
¥From the root of your project; type the following in your command prompt to install and launch your app on the device:
- npm
- Yarn
npm run android
yarn android
如果你收到 "桥接配置不可用" 错误,请参阅 使用 adb 反向。
¥If you get a "bridge configuration isn't available" error, see Using adb reverse.
你还可以使用 React Native CLI 生成并运行 release 构建(例如,从项目的根目录:yarn android --mode release)。
¥You can also use the React Native CLI to generate and run a release build (e.g. from the root of your project: yarn android --mode release).
连接到开发服务器
你还可以通过连接到开发计算机上运行的开发服务器来在设备上快速迭代。有多种方法可以实现此目的,具体取决于你是否可以访问 USB 电缆或 Wi-Fi 网络。
¥You can also iterate quickly on a device by connecting to the development server running on your development machine. There are several ways of accomplishing this, depending on whether you have access to a USB cable or a Wi-Fi network.
方法 1:使用 adb 反向(推荐)
¥Method 1: Using adb reverse (recommended)
如果你的设备运行的是 Android 5.0 (Lollipop) 或更高版本,并且启用了 USB 调试,并且通过 USB 连接到你的开发计算机,则可以使用此方法。
¥You can use this method if your device is running Android 5.0 (Lollipop) or newer, it has USB debugging enabled, and it is connected via USB to your development machine.
在命令提示符中运行以下命令:
¥Run the following in a command prompt:
$ adb -s <device name> reverse tcp:8081 tcp:8081
要查找设备名称,请运行以下 adb 命令:
¥To find the device name, run the following adb command:
$ adb devices
你现在可以从 开发菜单 启用快速刷新。只要你的 JavaScript 代码发生更改,你的应用就会重新加载。
¥You can now enable Fast Refresh from the Dev Menu. Your app will reload whenever your JavaScript code has changed.
方法 2:通过 Wi-Fi 连接
¥Method 2: Connect via Wi-Fi
你还可以通过 Wi-Fi 连接到开发服务器。你首先需要使用 USB 电缆在设备上安装该应用,但完成后,你可以按照这些说明进行无线调试。在继续之前,你需要知道开发计算机的当前 IP 地址。
¥You can also connect to the development server over Wi-Fi. You'll first need to install the app on your device using a USB cable, but once that has been done you can debug wirelessly by following these instructions. You'll need your development machine's current IP address before proceeding.
你可以在系统设置(或系统偏好设置)→ 网络中找到 IP 地址。
¥You can find the IP address in System Settings (or System Preferences) → Network.
-
确保你的注意本电脑和手机处于同一 Wi-Fi 网络。
¥Make sure your laptop and your phone are on the same Wi-Fi network.
-
在你的设备上打开 React Native 应用。
¥Open your React Native app on your device.
-
你会看到 红屏并出现错误。还行吧。以下步骤将解决该问题。
¥You'll see a red screen with an error. This is OK. The following steps will fix that.
-
打开应用内的 开发菜单。
¥Open the in-app Dev Menu.
-
转到开发设置→设备的调试服务器主机和端口。
¥Go to Dev Settings → Debug server host & port for device.
-
输入你计算机的 IP 地址和本地开发服务器的端口(例如
10.0.1.1:8081)。¥Type in your machine's IP address and the port of the local dev server (e.g.
10.0.1.1:8081). -
返回开发菜单并选择重新加载 JS。
¥Go back to the Dev Menu and select Reload JS.
你现在可以从 开发菜单 启用快速刷新。只要你的 JavaScript 代码发生更改,你的应用就会重新加载。
¥You can now enable Fast Refresh from the Dev Menu. Your app will reload whenever your JavaScript code has changed.
构建你的生产应用
¥Building your app for production
你已经使用 React Native 构建了一个出色的应用,现在你渴望在 Play 商店中发布它。该过程与任何其他原生 Android 应用相同,但需要考虑一些其他注意事项。请按照 生成签名的 APK 指南了解更多信息。
¥You have built a great app using React Native, and you are now itching to release it in the Play Store. The process is the same as any other native Android app, with some additional considerations to take into account. Follow the guide for generating a signed APK to learn more.
1. 启用通过 USB 调试
¥ Enable Debugging over USB
默认情况下,大多数 Android 设备只能安装和运行从 Google Play 下载的应用。你需要在设备上启用 USB 调试才能在开发期间安装你的应用。
¥Most Android devices can only install and run apps downloaded from Google Play, by default. You will need to enable USB Debugging on your device in order to install your app during development.
要在设备上启用 USB 调试,你首先需要启用 "开发者选项" 菜单,方法是转至设置 → 关于手机 → 软件信息,然后点击底部的 Build number 行七次。然后你可以返回“设置”→“开发者选项”以启用 "USB 调试"。
¥To enable USB debugging on your device, you will first need to enable the "Developer options" menu by going to Settings → About phone → Software information and then tapping the Build number row at the bottom seven times. You can then go back to Settings → Developer options to enable "USB debugging".
2. 通过 USB 插入你的设备
¥ Plug in your device via USB
现在让我们设置一个 Android 设备来运行我们的 React Native 项目。继续通过 USB 将你的设备插入你的开发机器。
¥Let's now set up an Android device to run our React Native projects. Go ahead and plug in your device via USB to your development machine.
现在,通过运行 adb devices 来检查你的设备是否正确连接到 ADB(Android 调试桥)。
¥Now check that your device is properly connecting to ADB, the Android Debug Bridge, by running adb devices.
$ adb devices
List of devices attached
emulator-5554 offline   # Google emulator
14ed2fcc device         # Physical device
在右栏中看到 device 表示设备已连接。你一次只能连接一台设备。
¥Seeing device in the right column means the device is connected. You must have only one device connected at a time.
3. 运行你的应用
¥ Run your app
从项目的根目录,在命令提示符中运行以下命令以在设备上安装并启动你的应用:
¥From the root of your project, run the following in your command prompt to install and launch your app on the device:
- npm
- Yarn
npm run android
yarn android
你还可以使用 React Native CLI 生成并运行 release 构建(例如,从项目的根目录:yarn android --mode release)。
¥You can also use the React Native CLI to generate and run a release build (e.g. from the root of your project: yarn android --mode release).
连接到开发服务器
你还可以通过连接到开发计算机上运行的开发服务器来在设备上快速迭代。有多种方法可以实现此目的,具体取决于你是否可以访问 USB 电缆或 Wi-Fi 网络。
¥You can also iterate quickly on a device by connecting to the development server running on your development machine. There are several ways of accomplishing this, depending on whether you have access to a USB cable or a Wi-Fi network.
方法 1:使用 adb 反向(推荐)
¥Method 1: Using adb reverse (recommended)
如果你的设备运行的是 Android 5.0 (Lollipop) 或更高版本,并且启用了 USB 调试,并且通过 USB 连接到你的开发计算机,则可以使用此方法。
¥You can use this method if your device is running Android 5.0 (Lollipop) or newer, it has USB debugging enabled, and it is connected via USB to your development machine.
在命令提示符中运行以下命令:
¥Run the following in a command prompt:
$ adb -s <device name> reverse tcp:8081 tcp:8081
要查找设备名称,请运行以下 adb 命令:
¥To find the device name, run the following adb command:
$ adb devices
你现在可以从 开发菜单 启用快速刷新。只要你的 JavaScript 代码发生更改,你的应用就会重新加载。
¥You can now enable Fast Refresh from the Dev Menu. Your app will reload whenever your JavaScript code has changed.
方法 2:通过 Wi-Fi 连接
¥Method 2: Connect via Wi-Fi
你还可以通过 Wi-Fi 连接到开发服务器。你首先需要使用 USB 电缆在设备上安装该应用,但完成后,你可以按照这些说明进行无线调试。在继续之前,你需要知道开发计算机的当前 IP 地址。
¥You can also connect to the development server over Wi-Fi. You'll first need to install the app on your device using a USB cable, but once that has been done you can debug wirelessly by following these instructions. You'll need your development machine's current IP address before proceeding.
打开命令提示符并键入 ipconfig 以查找计算机的 IP 地址 (更多信息)。
¥Open the command prompt and type ipconfig to find your machine's IP address (more info).
-
确保你的注意本电脑和手机处于同一 Wi-Fi 网络。
¥Make sure your laptop and your phone are on the same Wi-Fi network.
-
在你的设备上打开 React Native 应用。
¥Open your React Native app on your device.
-
你会看到 红屏并出现错误。还行吧。以下步骤将解决该问题。
¥You'll see a red screen with an error. This is OK. The following steps will fix that.
-
打开应用内的 开发菜单。
¥Open the in-app Dev Menu.
-
转到开发设置→设备的调试服务器主机和端口。
¥Go to Dev Settings → Debug server host & port for device.
-
输入你计算机的 IP 地址和本地开发服务器的端口(例如
10.0.1.1:8081)。¥Type in your machine's IP address and the port of the local dev server (e.g.
10.0.1.1:8081). -
返回开发菜单并选择重新加载 JS。
¥Go back to the Dev Menu and select Reload JS.
你现在可以从 开发菜单 启用快速刷新。只要你的 JavaScript 代码发生更改,你的应用就会重新加载。
¥You can now enable Fast Refresh from the Dev Menu. Your app will reload whenever your JavaScript code has changed.
构建你的生产应用
¥Building your app for production
你已经使用 React Native 构建了一个出色的应用,现在你渴望在 Play 商店中发布它。该过程与任何其他原生 Android 应用相同,但需要考虑一些其他注意事项。请按照 生成签名的 APK 指南了解更多信息。
¥You have built a great app using React Native, and you are now itching to release it in the Play Store. The process is the same as any other native Android app, with some additional considerations to take into account. Follow the guide for generating a signed APK to learn more.
1. 启用通过 USB 调试
¥ Enable Debugging over USB
默认情况下,大多数 Android 设备只能安装和运行从 Google Play 下载的应用。你需要在设备上启用 USB 调试才能在开发期间安装你的应用。
¥Most Android devices can only install and run apps downloaded from Google Play, by default. You will need to enable USB Debugging on your device in order to install your app during development.
要在设备上启用 USB 调试,你首先需要启用 "开发者选项" 菜单,方法是转至设置 → 关于手机 → 软件信息,然后点击底部的 Build number 行七次。然后你可以返回“设置”→“开发者选项”以启用 "USB 调试"。
¥To enable USB debugging on your device, you will first need to enable the "Developer options" menu by going to Settings → About phone → Software information and then tapping the Build number row at the bottom seven times. You can then go back to Settings → Developer options to enable "USB debugging".
2. 通过 USB 插入你的设备
¥ Plug in your device via USB
现在让我们设置一个 Android 设备来运行我们的 React Native 项目。继续通过 USB 将你的设备插入你的开发机器。
¥Let's now set up an Android device to run our React Native projects. Go ahead and plug in your device via USB to your development machine.
接下来,使用 lsusb 检查制造商代码(在 mac 上,必须先使用 安装 lsusb)。lsusb 应该输出类似这样的内容:
¥Next, check the manufacturer code by using lsusb (on mac, you must first install lsusb). lsusb should output something like this:
$ lsusb
Bus 002 Device 002: ID 8087:0024 Intel Corp. Integrated Rate Matching Hub
Bus 002 Device 001: ID 1d6b:0002 Linux Foundation 2.0 root hub
Bus 001 Device 003: ID 22b8:2e76 Motorola PCS
Bus 001 Device 002: ID 8087:0024 Intel Corp. Integrated Rate Matching Hub
Bus 001 Device 001: ID 1d6b:0002 Linux Foundation 2.0 root hub
Bus 004 Device 001: ID 1d6b:0003 Linux Foundation 3.0 root hub
Bus 003 Device 001: ID 1d6b:0002 Linux Foundation 2.0 root hub
这些线代表当前连接到你的计算机的 USB 设备。
¥These lines represent the USB devices currently connected to your machine.
你需要代表你的手机的线路。如果你有疑问,请尝试拔下手机并再次运行命令:
¥You want the line that represents your phone. If you're in doubt, try unplugging your phone and running the command again:
$ lsusb
Bus 002 Device 002: ID 8087:0024 Intel Corp. Integrated Rate Matching Hub
Bus 002 Device 001: ID 1d6b:0002 Linux Foundation 2.0 root hub
Bus 001 Device 002: ID 8087:0024 Intel Corp. Integrated Rate Matching Hub
Bus 001 Device 001: ID 1d6b:0002 Linux Foundation 2.0 root hub
Bus 004 Device 001: ID 1d6b:0003 Linux Foundation 3.0 root hub
Bus 003 Device 001: ID 1d6b:0002 Linux Foundation 2.0 root hub
你会看到,删除手机后,包含手机型号(本例中为 "摩托罗拉个人电脑")的行从列表中消失。这是我们关心的线。
¥You'll see that after removing the phone, the line which has the phone model ("Motorola PCS" in this case) disappeared from the list. This is the line that we care about.
Bus 001 Device 003: ID 22b8:2e76 Motorola PCS
在上面的行中,你想要获取设备 ID 的前四位数字:
¥From the above line, you want to grab the first four digits from the device ID:
22b8:2e76
在本例中,它是 22b8。这是摩托罗拉的标识符。
¥In this case, it's 22b8. That's the identifier for Motorola.
你需要将其输入到你的 udev 规则中才能启动并运行:
¥You'll need to input this into your udev rules in order to get up and running:
echo 'SUBSYSTEM=="usb", ATTR{idVendor}=="22b8", MODE="0666", GROUP="plugdev"' | sudo tee /etc/udev/rules.d/51-android-usb.rules
确保将 22b8 替换为在上述命令中获得的标识符。
¥Make sure that you replace 22b8 with the identifier you get in the above command.
现在,通过运行 adb devices 来检查你的设备是否正确连接到 ADB(Android 调试桥)。
¥Now check that your device is properly connecting to ADB, the Android Debug Bridge, by running adb devices.
$ adb devices
List of devices attached
emulator-5554 offline   # Google emulator
14ed2fcc device         # Physical device
在右栏中看到 device 表示设备已连接。你一次只能连接一台设备。
¥Seeing device in the right column means the device is connected. You must have only one device connected at a time.
3. 运行你的应用
¥ Run your app
在项目的根目录中,在命令提示符中键入以下内容以在设备上安装并启动你的应用:
¥From the root of your project, type the following in your command prompt to install and launch your app on the device:
- npm
- Yarn
npm run android
yarn android
如果你收到 "桥接配置不可用" 错误,请参阅 使用 adb 反向。
¥If you get a "bridge configuration isn't available" error, see Using adb reverse.
你还可以使用 React Native CLI 生成并运行 release 构建(例如,从项目的根目录:yarn android --mode release)。
¥You can also use the React Native CLI to generate and run a release build (e.g. from the root of your project: yarn android --mode release).
连接到开发服务器
你还可以通过连接到开发计算机上运行的开发服务器来在设备上快速迭代。有多种方法可以实现此目的,具体取决于你是否可以访问 USB 电缆或 Wi-Fi 网络。
¥You can also iterate quickly on a device by connecting to the development server running on your development machine. There are several ways of accomplishing this, depending on whether you have access to a USB cable or a Wi-Fi network.
方法 1:使用 adb 反向(推荐)
¥Method 1: Using adb reverse (recommended)
如果你的设备运行的是 Android 5.0 (Lollipop) 或更高版本,并且启用了 USB 调试,并且通过 USB 连接到你的开发计算机,则可以使用此方法。
¥You can use this method if your device is running Android 5.0 (Lollipop) or newer, it has USB debugging enabled, and it is connected via USB to your development machine.
在命令提示符中运行以下命令:
¥Run the following in a command prompt:
$ adb -s <device name> reverse tcp:8081 tcp:8081
要查找设备名称,请运行以下 adb 命令:
¥To find the device name, run the following adb command:
$ adb devices
你现在可以从 开发菜单 启用快速刷新。只要你的 JavaScript 代码发生更改,你的应用就会重新加载。
¥You can now enable Fast Refresh from the Dev Menu. Your app will reload whenever your JavaScript code has changed.
方法 2:通过 Wi-Fi 连接
¥Method 2: Connect via Wi-Fi
你还可以通过 Wi-Fi 连接到开发服务器。你首先需要使用 USB 电缆在设备上安装该应用,但完成后,你可以按照这些说明进行无线调试。在继续之前,你需要知道开发计算机的当前 IP 地址。
¥You can also connect to the development server over Wi-Fi. You'll first need to install the app on your device using a USB cable, but once that has been done you can debug wirelessly by following these instructions. You'll need your development machine's current IP address before proceeding.
打开终端并输入 /sbin/ifconfig 以查找计算机的 IP 地址。
¥Open a terminal and type /sbin/ifconfig to find your machine's IP address.
-
确保你的注意本电脑和手机处于同一 Wi-Fi 网络。
¥Make sure your laptop and your phone are on the same Wi-Fi network.
-
在你的设备上打开 React Native 应用。
¥Open your React Native app on your device.
-
你会看到 红屏并出现错误。还行吧。以下步骤将解决该问题。
¥You'll see a red screen with an error. This is OK. The following steps will fix that.
-
打开应用内的 开发菜单。
¥Open the in-app Dev Menu.
-
转到开发设置→设备的调试服务器主机和端口。
¥Go to Dev Settings → Debug server host & port for device.
-
输入你计算机的 IP 地址和本地开发服务器的端口(例如
10.0.1.1:8081)。¥Type in your machine's IP address and the port of the local dev server (e.g.
10.0.1.1:8081). -
返回开发菜单并选择重新加载 JS。
¥Go back to the Dev Menu and select Reload JS.
你现在可以从 开发菜单 启用快速刷新。只要你的 JavaScript 代码发生更改,你的应用就会重新加载。
¥You can now enable Fast Refresh from the Dev Menu. Your app will reload whenever your JavaScript code has changed.
构建你的生产应用
¥Building your app for production
你已经使用 React Native 构建了一个出色的应用,现在你渴望在 Play 商店中发布它。该过程与任何其他原生 Android 应用相同,但需要考虑一些其他注意事项。请按照 生成签名的 APK 指南了解更多信息。
¥You have built a great app using React Native, and you are now itching to release it in the Play Store. The process is the same as any other native Android app, with some additional considerations to take into account. Follow the guide for generating a signed APK to learn more.
在 iOS 设备上运行你的应用
¥Running your app on iOS devices
开发操作系统
¥Development OS
- macOS
- Windows
- Linux
1. 通过 USB 插入你的设备
¥ Plug in your device via USB
使用 USB 转 Lightning 或 USB-C 电缆将你的 iOS 设备连接到 Mac。导航到项目中的 ios 文件夹,然后打开 .xcodeproj 文件,或者如果你使用 CocoaPods,则打开 .xcworkspace,在其中使用 Xcode。
¥Connect your iOS device to your Mac using a USB to Lightning or USB-C cable. Navigate to the ios folder in your project, then open the .xcodeproj file, or if you are using CocoaPods open .xcworkspace, within it using Xcode.
如果这是你第一次在 iOS 设备上运行应用,你可能需要注册你的设备以进行开发。从 Xcode 的菜单栏中打开“产品”菜单,然后转到“目标”。从列表中查找并选择你的设备。然后 Xcode 将注册你的设备以进行开发。
¥If this is your first time running an app on your iOS device, you may need to register your device for development. Open the Product menu from Xcode's menubar, then go to Destination. Look for and select your device from the list. Xcode will then register your device for development.
2. 配置代码签名
¥ Configure code signing
如果你还没有 Apple 开发者账号,请注册。
¥Register for an Apple Developer account if you don't have one yet.
在 Xcode Project Navigator 中选择你的项目,然后选择你的主要目标(它应该与你的项目具有相同的名称)。查找 "一般的" 选项卡。前往 "签约",并确保在“团队”下拉列表中选择了你的 Apple Developer 账户或团队。对测试目标执行相同的操作(它以测试结束,并且低于你的主要目标)。
¥Select your project in the Xcode Project Navigator, then select your main target (it should share the same name as your project). Look for the "General" tab. Go to "Signing" and make sure your Apple Developer account or team is selected under the Team dropdown. Do the same for the tests target (it ends with Tests, and is below your main target).
对项目中的测试目标重复此步骤。
¥Repeat this step for the Tests target in your project.

3. 构建并运行你的应用
¥ Build and Run your app
如果一切设置正确,你的设备将在 Xcode 工具栏中列为构建目标,并且还将显示在“设备”窗格中 (Shift ⇧ + Cmd ⌘ + 2)。你现在可以按“构建并运行”按钮 (Cmd ⌘ + R) 或从“产品”菜单中选择“运行”。你的应用很快就会在你的设备上启动。
¥If everything is set up correctly, your device will be listed as the build target in the Xcode toolbar, and it will also appear in the Devices pane (Shift ⇧ + Cmd ⌘ + 2). You can now press the Build and run button (Cmd ⌘ + R) or select Run from the Product menu. Your app will launch on your device shortly.
![]()
如果你遇到任何问题,请查看 Apple 的 在设备上启动你的应用 文档。
¥If you run into any issues, please take a look at Apple's Launching Your App on a Device docs.
连接到开发服务器
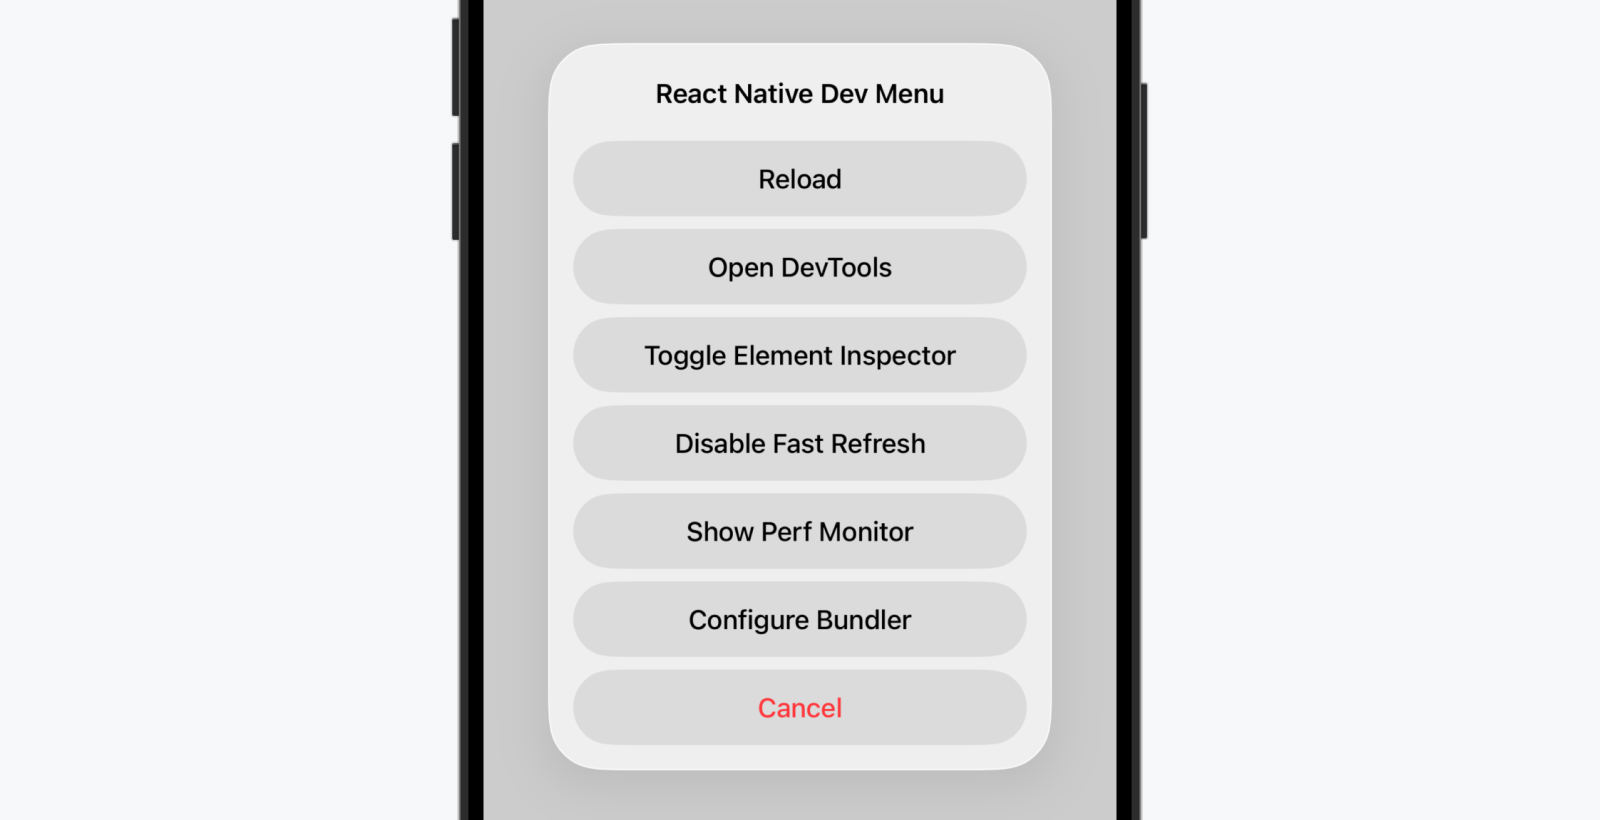
你还可以使用开发服务器在设备上快速迭代。你只需与计算机处于同一 Wi-Fi 网络即可。摇动你的设备以打开 开发菜单,然后启用快速刷新。只要你的 JavaScript 代码发生更改,你的应用就会重新加载。
¥You can also iterate quickly on a device using the development server. You only have to be on the same Wi-Fi network as your computer. Shake your device to open the Dev Menu, then enable Fast Refresh. Your app will reload whenever your JavaScript code has changed.
故障排除
¥Troubleshooting
如果你遇到任何问题,请确保你的 Mac 和设备位于同一网络上并且可以相互访问。许多具有强制门户的开放无线网络都被配置为阻止设备访问网络上的其他设备。在这种情况下,你可以使用设备的个人热点功能。你还可以通过 USB 将 Mac 上的互联网(Wi-Fi/以太网)连接共享到你的设备,并通过此隧道连接到打包器,以获得非常高的传输速度。
¥If you have any issues, ensure that your Mac and device are on the same network and can reach each other. Many open wireless networks with captive portals are configured to prevent devices from reaching other devices on the network. You may use your device's Personal Hotspot feature in this case. You may also share your internet (Wi-Fi/Ethernet) connection from your Mac to your device via USB and connect to the bundler through this tunnel for very high transfer speeds.
当尝试连接到开发服务器时,你可能会收到 红屏并出现错误 消息:
¥When trying to connect to the development server you might get a red screen with an error saying:
与 http://localhost:8081/debugger-proxy?role=client 的连接超时。你正在运行节点代理吗?如果你正在设备上运行,请检查 RCTWebSocketExecutor.m 中是否有正确的 IP 地址。
¥Connection to http://localhost:8081/debugger-proxy?role=client timed out. Are you running node proxy? If you are running on the device, check if you have the right IP address in RCTWebSocketExecutor.m.
要解决此问题,请检查以下几点。
¥To solve this issue check the following points.
1. 无线网络。
¥ Wi-Fi network.
确保你的注意本电脑和手机处于同一 Wi-Fi 网络。
¥Make sure your laptop and your phone are on the same Wi-Fi network.
2. IP 地址
¥ IP address
确保构建脚本正确检测到你计算机的 IP 地址(例如 10.0.1.123)。
¥Make sure that the build script detected the IP address of your machine correctly (e.g. 10.0.1.123).

打开报告导航器选项卡,选择最后一个版本并搜索 IP=,后跟 IP 地址。嵌入应用中的 IP 地址应与你的计算机 IP 地址匹配。
¥Open the Report navigator tab, select the last Build and search for IP= followed by an IP address. The IP address which gets embedded in the app should match your machines IP address.
构建你的生产应用
¥Building your app for production
你已经使用 React Native 构建了一个出色的应用,现在你渴望在 App Store 中发布它。该过程与任何其他原生 iOS 应用相同,但需要考虑一些其他注意事项。请按照 发布到 Apple App Store 指南了解更多信息。
¥You have built a great app using React Native, and you are now itching to release it in the App Store. The process is the same as any other native iOS app, with some additional considerations to take into account. Follow the guide for publishing to the Apple App Store to learn more.
为 iOS 设备构建应用需要 Mac。或者,你可以参考我们的 环境设置指南 了解如何使用 Expo CLI 构建你的应用,这将允许你使用 Expo 客户端应用运行你的应用。
¥A Mac is required in order to build your app for iOS devices. Alternatively, you can refer to our environment setup guide to learn how to build your app using Expo CLI, which will allow you to run your app using the Expo client app.